WOYWW #x – Workspace then and Now.

It’s been a while since I participated in WOYWW, and I am not doing so now as this post has been ready for a while but somehow I don’t manage to post it on Wednesdays. Didn’t participated for the most common reason: major lack of time to be online. I knew I wouldn’t have the time to visit people, so I didn’t participate. I still don’t have much time, but I’d like to show the changes made to my workspace.

Before

An open cupboard, (actually an IKEA PAX cupboard, 58 cm deep, 100cm wide, 236 cm high) with a curtain (from the childrens room from the previous appartment) in front of it. Lots of storage space, but not it didn’t turn out very convenient as I had to keep moving stuff to get to the stuff in the back.

This is how much of my stuff is stuffed away.

This is how much of my stuff is stuffed away.

Turning around, you can see the table, and 3 chests of drawers. Or actually, you can only see one. Two are stacked, and the other one is next to them, below the shoebox decorated with white-rosed paper.

Daqadoodles140819di223047

Here you can see the two stacked ones.

Wednesday 00:40

Wednesday 00:40

Now

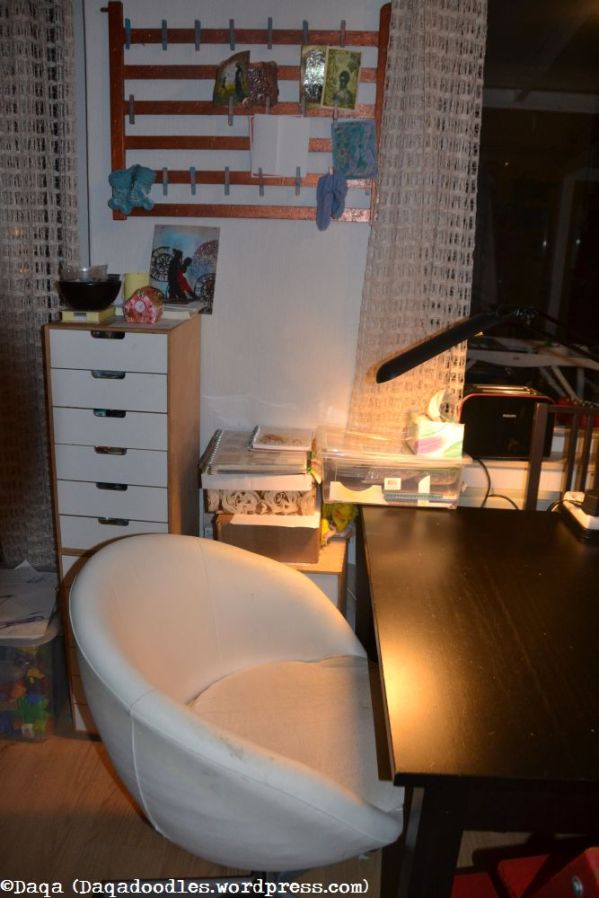
(Or rather, end of february 2015). I got another pax, the less deep one (35 cm, still 100cm wide and 238 cm tall) and added doors. Our current bedroom is differently shaped and a bit smaller then the previous one (moved april 2014), so we got sliding doors instead of these hinged doors. At first, I didn’t think they’d fit well in our living room. But now I think they do, it looks way better then the curtain, it looks less cluttered as the floor and cupboardoors match quite well. Also, as you can see, the tower of drawers is now next tot the cupboard.

Daqadoodles150228za001322006

Which makes it possible for the tabl e to be extended more, and which makes it look more calm in that corner. (just hink away the mess on the table).Daqadoodles150228za001041005


Then onto some (I think clever) storage system. You know how supermarkets sometimes have special offers where you can save stuff? This sheet of metal is from Jan Linders, you could save grocery magnets so the kids could make a grocery list with images. The backside is covered with chalkboard paint.

With double sided tape I stuck it to the door and added some of the sizzix movers and shapers dies to it. This way I can SEE them, and therefore hopefully use them more. I added some tape at the height of the shelve, as I shouldn’t put dies there – they’d hit the shelve if I do. I did add a little helper thingy there, that small square isn’t a die but is meant to be able to lift paper out of sizzix bigz frame dies more easily.

Daqadoodles150228za001513008

Note that purple thingy on the cupboard door? It´s a Grippy. It´s meant to keep your cellphone from sliding all over the dashboard of your car. It´s made of the same material as the old slimy hands which you could throw against a wall and then it would walk-climb down. We liked it so we bought a few to give a way as gifts to other nerdy friends, but we forgot about them. Later when I found them I thought I might be able to use them. Now I use them indeed… Put it on an acryllic block, put your unmounted stamp or mounted-but-not-sticking-stamp on it, and voila! Same effect as the tack’npeel, only now both sides are tacky instead just one, and you don’t attach it permanently to your acryllic block. Reason I used this is that I didn’t have a large enough size of tack ‘n peel on an acryllic block, and you attach the tnp permanet to a block. I don’t have multiple same sized big acryllic blocks so I didn’t want it permanently attached.


On the other side I stuck two A4 magnetic sheets. I didn’t have any more at the time, meanwhile I have added two more to have a bit more space for my dies. Many dies are on there, some that aren’t are nesting dies, I still prefer those in the metal tin (that used to hold pencils) which I lined with magnetic sheets as well. Now it is very easy to see my dies and pick one. I haven’t noticed I used them more often by the way. I love dies, I keep buying some occasionally, but I don’t use them a lot anymore, I often find it hard to combine them with stamping.

Daqadoodles150228za001440007The bottom shelve is still unsorted, I just stuffed all (or most) remaining paper there. On the next shelve are my binders with stamps, stencils, inventory list, spare mounting foam and a few stuff-tainers.

The third shelve: on the left part in the back are A4 papers/cardboard in my self made magazine files (made from cat litter boxes). I hardly use those papers. In front some tins with brushes and the plain tape. In the tin with the apple on it (stroopblikje) are brushes which my kids are allowed to use. Next to it, HEMA correspondentie kaartjes which I bought recently, I quite like them. In the brown box is A5 cardboard in several colours or designs. Don’t use those often either. Sometimes as backing card. In the blue plastic bin are the larger sizzix dies, many of them second hand. On top of it, you can see the pencil tin which hold some nesting dies, and on top of that a lightly decorated shoebox with unfinished cards inside. I have a new stack to add to it.

4th shelve, more little and big shoeboxes. Above it a shelve with A3 sixed paper and other bits that don’t fit on another shelve.

6th shelve, (6th if the bottom is a shelve too, that is): lots of small shoeboxes. My sponges are on there, distress markers, a very nice wooden alfphabet stamp set.

Shelve above that contains stuff. (Mostly used item from this shelve: the glues that are on the front. The other boxes are much less used).

Top shelve: acryllic paint, finger paint, childrens paint and finished cards. Stored out of reach of enthousiastic childrens hands. Ofcourse, the paint should be in the plastic bin with the yellow lid behind it, but you know how it goes… you grab some paint out, put the bin back, use the paint, clean up everything and quickly store the paint somewhere near the place it should be stored.

Nowadays I don’t buy those large containers of paint anymore – it’s good for large projects but I hardly have those. Now it’s just the ranger paint dabber/do crafts/alleene’s/hema small sized acryllic paint containers. Those fit into the drawers on the right.

The pictures were taken a few weeks ago, currently working on a different project.

Oh I made one more change to the workarea, this was before Easter to be able to hang up some cholates. Let me make a picture, brb!

….

…… sorry it took a bit longer, ofcourse cleaned the table empty (still was stuff on it) and removed the chair with all the clothes.

Bundis upcycled – I’ve always wanted a decorating thing ( those circles which hang above a table and you can decorate?) but not enought to actually buy one. We didn’t have space to hang it anyway. But I wanted to hang up chocolate easter eggs! So I made this, and hung the eggs beneath and had put young plants/seedlings on top.

Daqadoodles150506wo234247003

The eggs are ofcourse eaten, the seedlings gone outside, and the space reclamed for my glass jars.

Beneath it now are 3 hearts – the smalles one is from Freya, she got it from one of my sisters on her birthday. The other two was a gift for me, they were plain white and for me to decorate. I’ve decorated one with alcohol ink, then put a varnish on top and then stmaped the drops. Problem is I stamped with Versafine rather then Stazon, and oily ink on varnish is not a good idea, doesn’t really adhere/dry. Still have to do the edges and the other side. Oh, and the other heart as well ;)/


Daqadoodles150506wo234743004

The kids aren’t allowed on the table and know glass can break. They’ve left it alone so far, only time when they wanted to get something is the hearts or the mini chest. The hearts can be seen in the bottom of the closet – still brown/not painted. Here, my kids have painted them. For Denise Silva from https://sdenisesilva.wordpress.com/ I’ve put the tissue boxes on the table.  Oh and I altered/repaird my Ikea lampshade a bit more. See here for the first part – now I have repaired the two holes on the edges. Didn’t have that decoupage paper anymore so made my own using plain white tissuepaper and some distress colours.


Storage

Ryn from Designs by Ryn asked how people store their stamps. While I was making a picture of it, I thought, why not present my entire storage system. Not all of it is perfect or works well, but it is what I have / use at the moment. I’ll share pictures and pro’s and cons of it.

Unmounted stamps on cling foam

Most of my stamps are mounted on cling foam. It saves space and I like working with acryllic blocks, it allows me to determine the position of the image better due to the outline of the stamp. I can easily place the stamp straight on the block and then line up the block with the edge of the paper.

I store the stamps laminated sheets which I put in binders:

  • bought sheets with 4 holes in them (at Chocolate Baroque);
  • bought sheets with 3 holes in them.
  • Self laminated sheets with self punched holes.
  • In binders per manufacturer: Easy to flip through for inspiration or to get a certain brand out for challenges. Just pick your ordner of brand (and style) of choice, put it on the table and start.

    Daqadoodles150505di092557023

    I started using an acryllic sheet to protect my stamps when opening the folder, also I put those in between when I am using the laminated sheet on 2 sides, so the stamps don’t press into eachother.

  • bought sheets with 4 holes in them (at Chocolate Baroque);
    • + : fits in to regular binders with the 2 pins.
    • – : in the 2 pin binders the holes are more strained, so they wear out sooner.
Daqadoodles150505di092430020

Celtic symbols from Designs by Ryn. (Ok it’s actually called wintersheet I think, but I prefer a seasonless name :P)


  • bought sheets with 3 holes in them.
    • + : 3 pin binders are less common in my house (never looked for them in stores, usually there’s the 2 pins there I think), but I have one or two binders who have 3 pins. They fit well in there.
    • + : The force on the sheets is more divided between the holes, the sheet has less room to wiggle around so the holes will tear less easily.
Daqadoodles150505di092419019

You could also use custom made backgrounds, here I only spritzed with orange inkwater. Beneath the samp you can see the sheet/image of the stamp, so I have all the information ready. You could laminate the original paper, but I scanned it and printed it out, as I use the originals in another binder, my index binder. Ofcourse, you can also just stamp the image and write the details of it by hand, but now I’ve got the logo of the designer (Designs by Ryn) on it as well.

Daqadoodles150505di092511021

Here I mainly gave the sheet a title (Deep Red), and stampd all images on the paper, wrote the stampsname and number beneath it and laminated it. I only forgot about the holes…ooops… It just fits, but I should remember that next time (make a “kantlijn”- a margin line?)


  • Self laminated sheets with self punched holes.
    • + : no uneccesary holes, make as many as you need in the right places
    • + : you can laminate the stamped image / manufacturer
    • + : it’s cheaper
    • +/- : even with laminated cardstock they seem a bit more bendable then the bought ones. This could be fixed by adding an extra sheet of carstock, but then the cardstock has to be made smaller then it is now for laminating. There’s a 3-4 mm edge now with standard A4 sheets which is good, but for thicker paper this edge shout be wider.
    • ?: I don’t know what the sheets are made of, so don’t know the long term effects on the cling foam.
Daqadoodles150505di092629024

I started redoing my binders, as I used to have the stamps stored face up on the page so I see the stamps when I browse the binder. But this one had the images on the left side, stamps on the other side, face down. Hmm isn’t that a good idea? Daqadoodles150505di092707025Have the image on one side, and the stamp on the back? The disadvantage is maybe more stamps falling off while browsing?

  • I forgot a 4th one: Sheets that are allready “ready to use


Mounting foam

Sometimes normal foam mounted stamps fall off. I can’t remember on which sheets they have been stored – I’ve moved them around a bit. It’s also the usage /dust that makes them less sticky. I get them to stick again by making sure the cling isn’t dirty, then rubbing it on my clothes to try to enhance the static part of it again. This doesn’t work for all though.  Other, better tips to revitatlize cling foam is much appreciated!

Cling foil

In the previous picture you can see a stamp sticking out – It’s a background stamp with cling foil. I don’t know the exact name, but it’s not the EZ-mount foam, but more like a plastic cover which shows the image. It doesn’t stick well to laminated sheets. It’s so annoying and can damage the stamps, as when a stamp falls off and I put a binder back in the cupboard I might put it half on the stamp so the stamp is dented… happened once..

Stamps with this foil are often stampendous stamps / hero arts big stamps. I would really appreciate tips on how to make them stick to the acryllic block, cleaning them with a wet cloth doesn’t help. Even directly new out of the packaging they don’t stick well, I’ve had them all inked up falling off acryllic blocks onto my project :(. Now I used them in combination with Tack ‘n Peel, like the unmounted stamps. So the stamping part is sorted, but not the storing part. Tips?

Clear stamps

I store them on the same laminated sheets. Small stamps I might store in thintainers.

Daqadoodles150505di093935001

Unmounted stamps without cling foam

Daqadoodles150505di093007029

Not the best solution, I know. It was origianly a box to store stamps that still had to be mounted, but then it became a storage for the small stamps. I don’t mount them anymore, I use Tack ‘n peel. The two acryllic blocks on the picture have this on them, the left one had it on for a while (I hardly clean it, if I would, it would be more transparent still but it’s fine like this). I put some leftover tack ‘n peel on the right one just a few evenings ago. Works good for small stamps, thought be careful with very thin rubber stamps (like The Stempelwinkel), it theoretically is possible to tear the stamp when pulling it off.

Mounted stamps

Some I store in Thick Stufftainers (see a previous picture), others are stored.. well.. like this:

Daqadoodles150505di093836032

It’s not really stored, it’s more like… gathered in this box so they wouldn’t be roaming about.

Indexating and masks

Now, how do I know which stamp is where? I write on the binder which designer/brands of stamps are in it. Designs by Ryn and Chocolate Baroque have their own binders, other brands have to share. For more easier browsing images I have a showcase album. I put the imagesheets from the manufacturer/designer in, if the image is on the sheet. If not, then I have to stamp them and then put them in the file. Or only the empty backingsheet (with usually the brandname and stampname) goes in, as a reminder I still need to stamp it…

Daqadoodles150505di092859028

You can see on these images my own made masks, made from normal (coloured) paper and spray glue – the glue should be non-stick if left to dry after spraying, but I’ve found it does stick eventually a bit too much. I’ve looked around for another (cheap) easy solution and I found one.Daqadoodles150505di092824027

Here are the Designs by Ryn sheets, and the masks are stamped onto (mostly) transparant) self adhesive window foil (zelfklevende transparante raamfolie). The advantage of these showcases is that I can put the masks on the image, so I won’t loose them and it’s easier to reuse them. Making a mask can take some extra time, but then you won’t have to do it again for quite a while, if handled well the masks lasts long. Do make them less sticky before sticking them onto your paper though! You can do this by sticking them onto your clothes and/or skin. Test on some scrappaper, I’ve been in a hurry and didn’t do this properly after making a mask, and put it down on still slightly damp paper… when taking it off it tore off a small bit of the top layer. I could repair it luckily, but still.

Cutting dies

I’ve mentioned these before:

Hmm oh right, that is still a concept post… Ok retry: I’m mentioning my entire workspace/storage area including the dies in an upcoming post. [edit: here!]Here’s a preview:

Daqadoodles150505di093803031

Stencils

Last, my stencils. They were in that showcase album before too, but it didn’t fit anymore so I searched for something else.

Daqadoodles150505di093712030

This is another showcase folder, and it works ok. I haven’t really sorted the stencils in there as I like browsing through them. Ofcourse you could sort them on brand/designer, theme, size etc, and I have done that for quite a while. Only when I am in a rush (or have made it later then bedtime allready) I’m not very picky about where I put the stencils back in. I just put them in a pocket that isn’t too full allready. I probably will sort them again in a while untill it’s a complete mess again.

If it wasn’t clear yet that I’m addicted to stamp and stencils then I think it’s clear now… I have more then enough of them, I should stop buyin…oooooh pretty stencil on sale….brb!

Any questions or tips? Please share!

WOYWW #275 – Collage

Before I show you what my desk (dining table) looks like now, I show you what it looked like at several times in the past few weeks on other days then Tuesdays. (If it was on a Tuesday I would probably have linked it up to WOYWW!)

Several of the projects you’ll see there aren’t posted yet, see the previous post with the collage/sneak peak of unblogged projects. (That is even still excluding unfinished projects if I’m right.)

workdeskcollage

And now, the desk/dining table of now:

Daqadoodles140910wo004314

Items visible on the image, in no particular order: Folded laundry, a teddybear my daughter got for free on a garage/carbootsale market last week (rommelmarkt), I got that tin basket there as well which I didn’t intend to use as I use it now , but this use suits me just fine ofcourse. In a post of another WOYWW-er she mentioned a place for her acryllic blocks. Great idea! And great ideas are there not to be reinvented but to be used, right?! So I try to store my acryllic blocks there. No more searching for that tiny block.

Also on the board, a breasfeeding schedule – I feed on request but sometimes it’s nice to have some guidance as to how much should he get, also because next monday he’ll be going to the daycare for the first time and I need to bring along enough milk.

As you can see, the pile of boxes and things has grown again. And the amount of started projects too. See the (backgrounds for) cards on the board? No? Well, let me zoom in on it:

Daqadoodles140910wo004348

Thanks to Anja from Artefaktotum I ran off from the computer (and chores) this afternoon to make these. Fun! Between making these backgrounds (1 or maybe 2 at a time) I experimented with mod melts. (More on that later. Someday, I’m sure).

Oh what a horrible picture I see now… you can’t really see the great effect and nice colours. Zoom!

Daqadoodles140910wo004406

Ah there, see? Better. Two cards with just acryllic paint and some glimmer mist. The texture is only paint. I intend to use the brown one for the Chocolate Baroque colour challenge. No idea how yet, something with gears? It’s a bit standard to do with brown background maybe. (Actually it’s antique gold and antique bronze).

Then, later this evening when I got back to the computer, I got distraced by building a blinkie for Ryn from Designs by Ryn because she liked that I place a “badge” on the sidebar. It wasn’t really a badge, the text was too small and off center, and maybe if I add some more information about her products, and hmm add some bits of this and that and why doesn’t it work like I know it should? Let’s search online, and try this, and tadaa! Now surprise her, darn, I tossed the mail away accidentally after working on it for 30 minutes. There, rewritten now add the image.. wait… edit it a bit… then done. Ooh is that the time?! Hey, it’s Wednesday, time for a WOYWW post!

And that’s how I end up with chronical lack of sleep and half finished chores…

So off with me, to bed! No need to get ill again (was ill on Saturday, some stomach flu and perhaps a chronic lack of sleep isn’t healthy either..)

Happy WOYWW all!

Argh I forgot – Thank you Julia for hosting this fun event! Anyone with a crafting space (or workspace) can join!

Debbie, #25 of  WOYWW #275

WOYWW #271

Time for another WOYWW, hosted by Julia from Stamping Ground. Curious what it is about? Hop on over to her site!

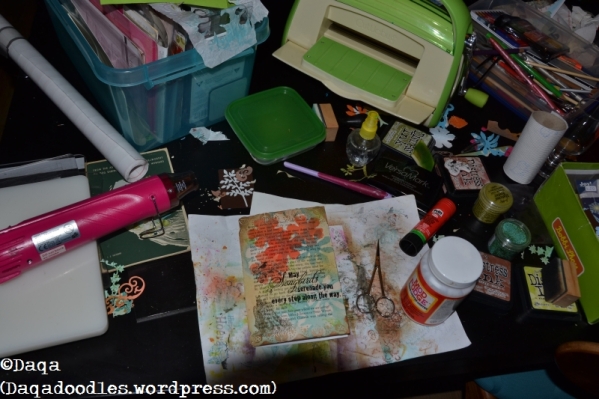
This is what my desk looked like after 1 1/2 hour of crafting (I did clean up a bit in between as I didn’t have space). This time I didn’t keep my crafting area clear, usually I put down a bigger cutting mat and try to keep that clear of stuff so I have room to do the actual crafting. Not this time, I just wanted to make some simple things, envelopes, and decorate them with a stencil and some distress ink – nothing fancy – so figured I didn’t need that much room.

wednesday 00:39

wednesday 00:39

What’s on there: A card of aluminium foil and a “copper” frame, heattool, distress markers, empty teacup, distress ink, embossing powder, can of paintbrushes, box of glue related things and things that aren’t glue related (you know, other things like a small package of brads, and just… little things in packages that I might use if they are on my table, but definetely won’t use if I put them out of sight). (Putting them on my table isn’t helping).

What’s more on there: a tin can with my childresn crayons which I confiscated. They rarely used them (in the Netherlands, children colour more with pencils (potloden) or felttip markers (viltstiften). On top of it is a spray can of sealer which I have never used yet, then you can see a binder in the back with some of my stamps, and on the right a drawer with my distress inks in it – I always just get the drawer out and put it on the table / chair.

Oh I forgot my wellbeloved spraythingy – unfortunately it got loose again so I’ll have to fix it, but need to fix it so it won’t leak this time. (The previous fix was putting the spray top on the glass jar because the original orange spray jar broke). [Oooh what a coïncidence, in that post is also the quote I have referred to a few times lately!]Oh, and those heart stickers on there: They have kind of become my pincushion. (What?) yup, pincushion for just 1 needle, and that one needle/pin (can you see it’s yellow head?) is to open up the tip of the glossy accents bottle, which is seen next to the drawer.

Let’s take a look to the left and a step back.

Wednesday 00:40

Wednesday 00:40

My frame for hanging nearly finsihed cards.

My ikea drawers with many of my supplies, two boxes which I need at hand. (It started out as one half box, then it got one full box quite soon, and now in the past month somehowe another box moved in there.) You can see into the second drawer, here are my other (big) inkpads, the little ones are in another drawer with the chalks.

Do you see the dowels sticking out of the drawer? That is my solution to nosy babies. You can imagine that having craft supplies in the same room where little kids play isn’t very safe. (health, furniture, money etc..) I wanted a simple solution so my son (at that time I only had him) couldn’t open the drawers. I’ve had the drawers for quite a long time and I had always planned to paint/decorate the sides but never done it yet. Because of this I didn’t feel bad about drilling holes in them.

Wednesday 00:41

Wednesday 00:41

My embossing powders (I still want some bright yellow!) and my “lock” solutions. A hole in the side of the board and drawer, a dowel in it and it’s closed. Don’t stuff your drawers so the dowel can’t be moved in though! How to open? Take a pencil/pen/thingy, and push the dowel in.

How do you prevent your kids from figuring this out too soon? Don’t open the drawers when they can see you do it. My son (aged 3) hasn’t noticed the dowels yet, so this fix still works.

Now, let’s put the camera away amd tidy things up a bit.

Wednesday 00:52

Wednesday 00:52

And then it really was time for bed!

WOYWW # 227, my showcase cupboard and a happy boy

I’ve been seeing various people join in on WOYWW (What’s On Your Workdesk Wednesday) from Stamping Ground, and I’ve had the idea of joining for some time now, but I was too late each time. It’s 23:35 now, and I was in a rush as I thought it was Wednesday allready. Guess what, it’s still Tuesday! So I’m on time. Technically, it’s a picture taken at Tuesday, but I have to clean my workdesk each day (as it is our dining table), and tomorrow I won’t have time to craft (so no interesting picture there). Also, I don’t think I’ve cleaned it up before midnight – still some minor things to finish, and then clean, so actually it IS a Wednesday situation. Well then, here’s the picture:

Daqadoodles13_10_08_23308

Yup, that is my table, on it is a card I am working on, before applying the mod podge. You can see diecuts lying around, those are supposed to be going on the card. My box of cuttlebug folders and a few sizzix dies,, the rest is either quite clear what it is or not visible enough. Let me try a different angle:

Daqadoodles13_10_08_23307My crafting cupboard. Or rather, one of my crafting cupboards. I’ve made an extra shelve last week (in my previous posts I had mentioned cleaning up), it’s the one shelve in the different colour. The brown oranizers contain my stamps, and there’s lots of paper. Behind the blue bin with folders is a decoupaged box with scraps, on top of that is my box of rubber unmounted stamps which I won’t put on ez-mount because they are too small or because the foam doesn’t stick anymore, I use an acryllic block with a sticky thingy on it. (I forgot the name. Tacky stuff?)

My showcase place

Another important place is the place I take my pictures. Or used to. It’s across from the table:

Daqadoodles13_07_03_205720

Actually it’s different now, as it has two copper lamps and a copper phone on it. Also the 3 chests of drawers are gone, and the stuff on top of the cupboard which is seen in the mirror is gone. The big cupboard with drawers also contains mostly crafting stuff. It is a bit of a showcase place though. I love the mirror, love the lavalamp, like the dried flowers (Don’t tell anyone I do, I only like THESE dried flowers). And I love bananas.

Daqadoodles13_07_03_205822

I still love the lava lamp, it’s fun to watch.

Daqadoodles13_07_03_210023

My “pressing station” and a frame with postcards from French Kissed Postcards, which are in split in new frames now (see previous post Copper Kisses).

Daqadoodles13_07_03_210425 Daqadoodles13_07_03_210426

The pressing station exists of a spare glass plate (for inside a cupboard) with the cardboard from the packaging (I glued a wallpaper sample on it so it looks pretty) and a salt crystal lamp without the lightbulbfitting and wire. (I still need to replace the lightbulb, it’s broken, and therefore the fitting is not in it). Also seen is my card-stand thingy. I found that the light is better if the card is slightly tilted, but ofcourse it won’t stand on it’s own so I made this simple ugly thing. Good thing it’s not visible on pictures. Oh, and the purpose of my pressing station is to reflatten cards or papers. Just put it beneath the glass plate, put the heavy salt lamp back on top and leave for a day or so. Papers come out almost completely flat.

Ofcourse, with all the moving of stuff I’ve done, the pressing station has moved to. Or actually, has been “dismantled”- I still have to find a new spot for it.

This is what is on top of the cupboard now:

One polished and one unpolished ship lantern and a copper telephone.

One polished and one unpolished ship lantern and a copper telephone.

The copper telephone is complete, but I took some parts off to clean it better. It still has to be cleaned more, but it’s ok for now. I love the ship lanterns, although I doubt if they really were used on a ship – I think these were made and meant for in a house. Maybe one day we’ll reinstall the wire and hang them, but for now, I like them on that cupboard.

Happy birthday boy

One more thing I’d like to mention: In my previous post preparations (and a birthdaycard for a 5 year old) I showed the card I made for that boy. We also gave him a toy bus, and at the last moment I decided to add some coins to the card. I don’t like to give money to a child, but I know children love getting money, or coins. Not paper money, but coins they can count. The boy who these gifts were for is lightly autistic, and has a strong opinion about toys he does or doesn’t like. We were told he liked public transport things, hence the bus and the train-themed card.

The toy was very well received, he and his younger brother play in turn with it, they both love it. He was delighted with the coins, counting them several times a day. And the card? He loves it! He even insisted on taking it to school to show his teacher the next day, and later that night was in tears because he couldn’t find the card when he went to bed, and he wanted to take it to bed with him. He had been walking around with it 2 minutes prior to that, so it wasn’t far gone – it was actually lying on a cupboard near his bed.

This moves me. How a child can be happy with simple things like that! I’m so glad I decided to also make  card for him. Usually, when we go to a kids birthday, we only bring a toy, it is not a custom in this part of the Netherlands to also bring a card. You mail a card, bring a gift.

So, it’s half past twelve now (00:30), and the table hasn’t changed much. So here it goes, my first WOYWW.

(Oh, the post isn’t up yet on the blog – I’ll add my entry in the morning!)

And here is how the dining table / crafting area looks now:

Daqadoodles13_10_09_01261

Preparations

It’s like a hurricane was in the dining room – why? I’ll explain further down the post.

Somewhere in between creating the hurricane-look I also made a card for the son of a friend, who will be 5 (or was it 6?). He is really into public transport, so I did my best to relate to that. I started out with a tardis from Vivalasvegastamps and chalk (well I did that (the tardis) more for his mother, who probably knows dr. Who), a track  from Stampinback and a Thomas the Train stamp-cut out. And some balloons. After I had done my best to colour in the balloons with my Neocolor crayons to get a good color coverage, I remembered another stamp from Crafty individuals: Boys Toys. Stamped that on top and then I had to “fix” the balloons a bit. I used my white gelpen freely. I would use it less if I had thought of that stamp sooner, but now it was just too much going on on one layer,  I used it to create another layer. More Caran D’ache Neon Colors later, and gluing it on a red card and it was done.

Daqadoodles13_10_05_23422

The idea was that T. would be making a drawing, but he got caught up in “cutting”. I just recently started to let him cut with a real steal (childrens) scissors, as the so called safe ones from plastic are too difficult to cut with. First, he got a little plastic scissors which was in a drawing set. It didn’t cut, so I searched for my old one when I was a kid, but the blade was loose so that didn’t really cut either. Then I bought plastic scissors which were a bit bigger, thinking those would be better then the first ones as it wasn’t included in a cheap set, but they didn’t cut. Today I bought metal childresn scissors, they cut perfectly. Only they are for left-handed children, and although T doesn’t have a clear preference yet, I think he’s right handed…. so… *sigh* still not the righ scissors.  so he was cutting enthousiastically, and not really making anything anymore, he was just cutting. Even in his drawing. The remaining bit of paper looks too much as a left over to be given. So after he went to bed I finished my card (I stopped at the balloons bit, so when I got back to the card I remembered the stamp).

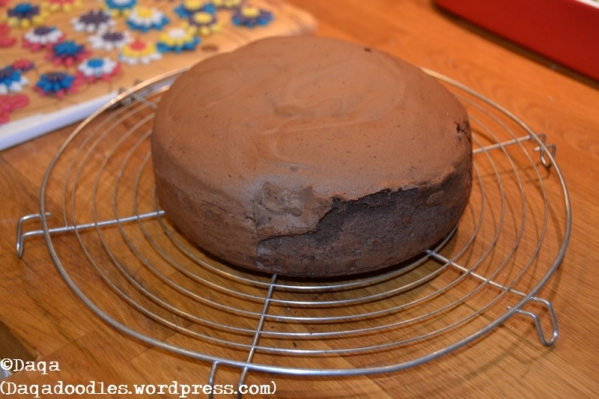
I also told you my daughter will be 1 soon. I am preparing a little bit for it, I made a small chocolage “biscuit” cake tonight, and put it in the freezer. A day before her birthday I’ll get it out and decorate it more. I also have to make a bigger cake. Theme for the cakes will be Maya de Bij.

It is not going to be very fancy, just green fondant over the cake (oh and some filling, don’t know what yet) and then these flowers I made tonight as decoration, together with a toy Maja.

Daqadoodles13_10_05_23307

Not really perfect… my previous “cake biscuits” ones were better. I guess that’s beginners luck.

Daqadoodles13_10_05_23298

Flowers and bows. Flowers with cutters from Albert Heijn (a Dutch big grocery chain), and the bow is from a mould.

Daqadoodles13_10_05_23306

When I was done I remembered I hadn’t thought of the treats for the daycare! How could I forget! Luckily I still have 1 week to think of something.

So, back to the hurricane. In my previous post I mentioned renovation, storing and storage. So I am in the process of cleaning out cupboard and organizing my crafting stuff. I knew I had lots of wasted space (and lots of waste too, actually, because of bad usage of storage. I’ve got 3 Ikea drawer chests, (If that is the right english word for “ladekastjes”) – they don’t sell them anymore, but ever since my previous move (so not the last one but the one before that) some of the drawers were kind of filled with stuff I didn’t know where to put or which I still had to sort. Others kept my jewelry making stuff (nothing fancy like gold or silver, but the beads kind of jewellry). I haven’t made a necklace or a bracelet in ages, and still the beads and tools were taking up 2 drawers. I moved most of it into 1 drawer now, and plan to use it on cards. My inks and inking tools were kept in little shoeboxes (childrens shoeboxes are great storage – they still fit inside the cupboard, as opposed to some of my shoeboxes which are just an inch too long to put in efficiently). Anyway, the inks have moved to the chest of drawers, and I added wheels to the bottom, and moved the whole thing under the dining table. Tadaaa! The 2nd cupboard is dedicated entirely to my kids crafting, none of my stuff in there (ok except for printing labels). Also with weels, and on the other side under the table.

Daqadoodles13_10_03_23512

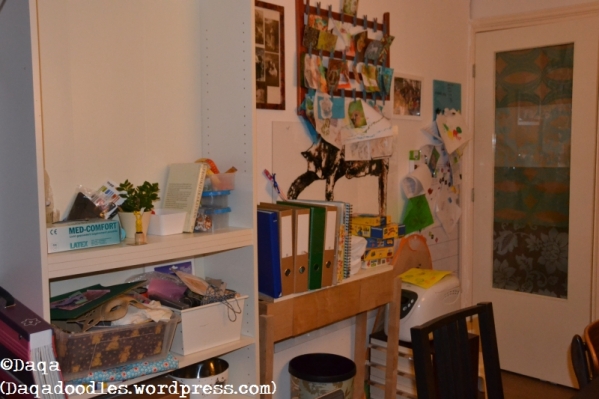
Halfway – the little sidetable I made on a blue monday in furniture / woodworking school, it was behind a big chair but placed here because it would go to storage. Ofcourse it got used immediately to put my binders with stamps on, while I was cleaning out the bookshelves on the left.

So much junk in this picture, most of the used and usefull stuff was allready moved to the cupboard on the right. Because I made an extra shelve in that cupboard (and I needed to paint it), the organizers couldn’t go in yet.  And there is also the Med-Comfort: the latex gloves which I bought a size to big, so they are annoying to use. I bought household gloves the other day, and thinking about my mistake here, took a small size. You can guess what I’ll say next. Yes. They were too small, my fingers went numb if I wore them for more then 10 minutes. So, onto the positive things in this picture: Look at my “work in progress board” – I still have to make a post about it. I like it a lot 🙂

Bookcase gone, sidetable gone, empty walls again! But the table is still cluttered, and I didn't dare put the extra table in the picture...

Bookcase gone, sidetable gone, empty walls again! But the table is still cluttered, and I didn’t dare put the extra table in the picture…

The top between the lower and upper cupboard on the left also is full of stuff that needs to be sorted. Laundry is under the kids chair. See the chest of drawers next to the red childrens chair? On the other side of the table is my chest of drawers. I know the memoboard is full too, it can be taken off as well, but first I’ll sort all the loose stuff that is lying around.

I think you’ve seen enough junk and chaos. I’ll conclude this post with a beautifull image. Please respect the authors copyright, and if repinning/sharing it, include the name of the artist and website. (phatpuppy facebook.com/phatpuppyart).

Pinned on Pinterest “My World and Welcome to It by phatpuppy (facebook.com/phatpuppyart) By request of the artist: please do not remove artist name or facebook link when repinning.

CPS Grand Challenge – cards, leftovers and workspace

Here is a quick roundup of all daily sketches + my cards. Click on the image of the card to go to the blogpost of that card. Beneath the cards you’ll see some wonderfull leftovers that didn’t make it onto or into a card yet, and some tools which I have become to love.

Day 1: Sketch #136 – Space pirates:

*

*

*

*

*

*

*

*

Day 2, sketch #166 – Oriental Cabinet:

*

*

*

*

*

*

*

Day 3, sketch #54 – Piraat Ahoy:

*

*

*

*

*

*

*

Day 4, sketch #220 – A Little Bird Told Me:

*

*

*

*

*

*

*

*

Day 5, sketch #38 – A Fairy Birthday:

*

*

*

*

*

*

*

Day 6, sketch #37 -Hidden jewels long forgotten:

*

*

*

*

*

*

*

Day 7, sketch #242 – Enjoy the renovation:

*

*

*

*

*

*

Day 8, sketch #102 – Remember the love:

*

*

*

*

*

*

Day 9, sketch #5 – You light up my life:

*

*

*

*

*

*

*

Day 10, sketch #26 – Sparkle sparkle:

*

*

*

*

*

*

*

Day 11, sketch #170 – Full of words:

*

*

*

*

*

*

*

Day 12, sketch #118 – Rusted Elegance:

*

*

*

*

*

*

Day 13, sketch #121 – Flowers in the Field:

*

*

*

*

*

*

*

Day 14, sketch #45 – India Inspiration:

*

*

*

*

*

*

*

Day 15, sketch #231 – Dear Cynthia:

*

*

*

*

*

*

*

My scraps

Not all items here are scraps from CPS – the birds in the upper left I made about a month ago, sort of birds flying out of the egg toward freedom. The sheet around the egg looks elegant and pretty, but at places is torn and you can see a rotten world behind it. It became a bit too dark/moody themed. Maybe I’ll use it and finish it another day.

The butterflycard next to it was made for Day 10, sketch #26 – Sparkle sparkle, but it’s quite big and I loved it very much, I didn’t want to cut it or see it covered! it is only the sheet of paper you see, so I only would need to add some folded cardstock to make a proper card from it. It doesn’t need much else. (It’s a bit brighter in reality). The card next to that one was made also in the beginning of cardmaking, with the use of wallpaper and some bunting and balloons of wallpaper. The bunting is only attached in the corners. Seeing it now I think it’s too basic – there is a reason I didn’t use it anymore, the shapes don’t match and there are too many different colours. The embossed and colored bookpage egg next to it is still very usable.

Now we get to the trees and fences of Day 11, sketch #170 – Full of words. See how the fences are too big? And the flowers on it, I’m not sure if I like how it turned out.

The little pieces in the middle: the hardware findings from Tim Holtz & the rusty hexagon, embossed, and then painted the hardware findings with crackle paint (it didn’t crackle very well, the paper just bends), for Day 12, sketch #118 – Rusted Elegance.

And there are my diamond background cards! I still love em. Made for Day 13, sketch #121 – Flowers in the Field.

The India images – with colours that don’t match and trying out embossing with powder. The paper lady silhouette – the edge of the text was wrong, so I cut her out again. The red cars from wallpaper: cut out with the wrong side of the wallpaper down.

The Cameo Silhouette background stamps (the blue and grey) – for Rusted Elegance.

The daffodils I cut off before they were completely withered, they are dry now and waiting to be used.

My sketch book – I drew the designs there roughly to have at hand. Below my medium size scraps-box, and on the left my small size scraps-box. It’s not very clearly visible, but there is an art deco image on top there, I had this folder of a museum and glued it onto cardstock and cut these shapes out. I got a few that could be used for 2 or 3 matching cards.

Oh and my big sized cup of tea – usually cold when I was halfway, because I had forgotten about it.

The lantern background was too pretty to cut up – I made another one for Day 9, sketch #5 – You light up my life. Does that happen to you too that you make something, intended to be cut up/out, and then don’t do it because you think it’s too pretty like it is?

The clocks and tea card – I had this new stampset (Pixie Glade) and wanted to try it out. I loved this result! I intended it to be some kind of background. But I really couldn’t get myself to cover it up, haha. Only like this it’s a bit too… I don’t know, background like? What should I do with it?

The right side card was from my fungus and old forgotten wallpaper period. I’ve played lots of computer games, and often the scenery is that of beauty that has perished, or became dirty because of the zombies that have roamed the place for a time. (Or something like that). I think this card should go to a gamer. I should add a zombie onto it, and a crowbar. Or a wooden board with a nail in it. (In many survival games you start out with either one of these as weapons.)

The hearts were made for a challenge for a dutch challenge blog (elke kaart een feestje), made with acryllic paint. I do like the shabbyness of the hearts. I eventually made this one:

The white paper with the pink circles is the remains of the circle from the Day 2, sketch #166 – Oriental Cabinet. I do like the remaining circle, but ofcourse this is very hard to use as it’s so big. Beneath that is cream cardstock woven with patterned paper – there are cats on it. No use for it yet. The strip with the cut out butterfly: I liked the background, so I tried to cut precisely as I coud use this as a silhouette.

You probably have noticed that spray thingy on the table, I have mentioned it before, it’s from Ikea. I can’t find it anymore so I guess it’s out of their collection (it’s about 10years old? Can’t remember when I bought it).

I love it to spray my background paper with. And doesn’t it look cute too?

Another one of my much appreciated items is this:

It’s actually from a kids cooking play set, but recently I found it again and it is very very usefull as a table-bin! I can’t put a bin on the floor as my son will pull it over and rummage through it whenever he gets the chance. I also am very carefull with snippets of paper – he is in the age that he puts everything in his mouth. He has eaten some paper yet, sometimes he gets hold of a sheet of printing paper, letter or ads and I am too slow to prevent him from putting it in his mouth. That is very thin paper which I often can’t get out again. Well, I am a bit more carefull doing that now as once I scratched his … eh.. gehemelte… the top of the inside of his mouth. That hurts ofcourse. So now if I can’t get it out right away I let him swallow it, usually it’s only a tiny piece which is soaked allready.

Ofcourse there are more tools that I use and love, but these are the most uncommon ones I think. The others are tools many people have: Ink blending tool, sponges, brushes, cutting knife, sciccors, guided cuttingthing, cutting board, ruler etc.

Oh, one other thing I forgot: My cleaning-cloth! It’s a basic yellow one, it was old and stained, but that’s perfect for me! That, in combination with my perfumespraycan without perfume makes it easy to clean stamps on the spot. It saves me lots of time having to wash all stamps after crafting or having to get up all the time to rinse them. For less deep stamps it is enough to spray a little bit of water on and wipe off with the cloth, for deep stamps where the ink really gets into then I have to spray some more, like a high pressure water device squirting all ink out. The cloth is behind it then ofcourse to catch excess water and wipe the stamp dry. Then, another use for the cloths is when I have sprayed water on my distressed papers I gently dab the cloth on the paper to absorb the water right away, this prevents the paper from becoming too wet or the drops too big.

Do you have leftovers which you love? Do you also have a hard time cutting/hiding parts of “resources” for cards you made, like me with the background tea and clocks and the Hero Arts nature frame and butterfly? What are your beautifull scraps that never get used?