Well my first workday after pregnancy leave was last Wednesday, and that was also the last for this week. It was very quiet at work, so didn’t feel stressed at all. I still had time to be creative this week! I also painted with the kids yesterday, I’ll show you after the card, so the people who are here for the card can skip the rest.
I decided I want to go ahead with a long slumbering idea of opening my own webstore. This means I have to buy supplies. I am bad at saving – I think I said for the last 6 months that I shouldn’t buy crafting goods anymore, that I had allready spent my budget for the coming month. (And the month thereafter). Now, however, I got a fixed goal and an achievable amount of money I’d like to save. But I can’t buy crafting goods anymore. (Ok well maybe only the stencils from Designs by Ryn, I still want those). But I think I need a monthly dose of new supplies, and the only way I can get that is to win them. (I know that signing up for challenges without a price doesn’t get me supplies, but it does motivate me).
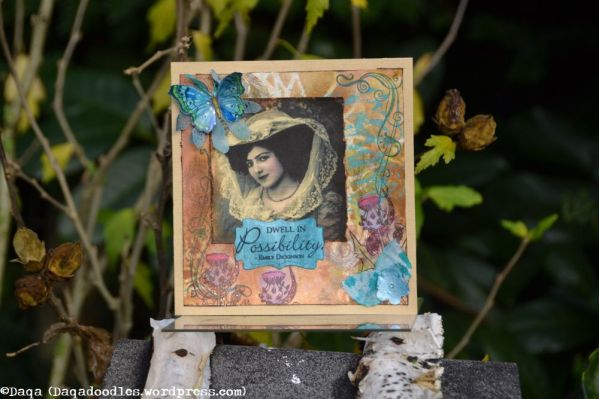
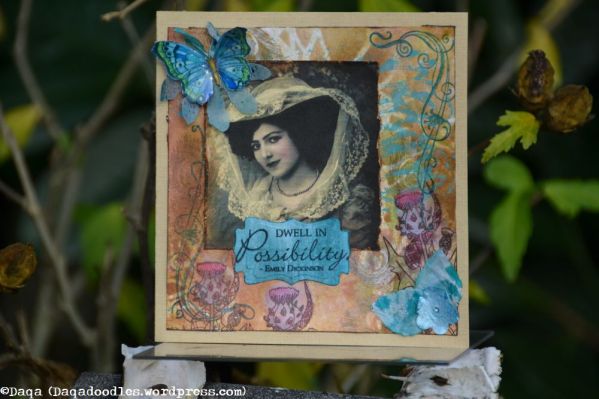
Going vintage is a challenge in itself, but maybe I can combine it with a French Kissed Postcards – image, I’ve been wanting to use one for a while but I am not really good at using digi/printed images. I combined it with Fall/Autumn, the vintage colours and aged look fit very well with Autumn, where the old leaves start to fall and warm colours decorate the trees and bushes. And I loved using this colour combo: Brown and blue! ((and cream and yellow)
Enough talking, on with the card. I admit I am very proud of this card, it makes me feel good. Isn’t that wonderful, that making a card makes you feel good? I also used up several items from my stash, yay!

Isn’t she just lovely? I immediately fell in love with the warm colours. It is currently not listed in Trishia’s store “French Kissed” on Etsy, but if you want it just convo Trishia and I’m sure she’ll put it up for you.
Materials used
The butterflies and doily are from my stash, the doily is from a Cheery Lynn die, the big butterfly is from a Christina Renee clear stamp set (not availble anymore) and the smaller butterfly is from a Chocolate Baroque stampset. The frame and text stamps are Crafter’s Companion from the Vintage line, and the blue diecut beneath the flowers is Joy Crafts. Both the paper for the doily, background and flowers is from an old English to Dutch dictionary. Colours used are Wild Honey, Vintage Photo and Broken China (with a touch of Salty Ocean), distress inks ofcourse.Also used are flower dies from Marianne design and Joy!Crafts.
How I made it
Background:I took a piece of cardstock, some pages from the dictionary which I ripped in pieces, and glued them on the cardstock. I used the Crafter’s Workshop Mariposas stencil on the background, with distress paint bundled sage and distress ink vintage photo. (Not really visible anymore). Then used Mod Podge decoupage glue to seal it. While this was still wet, I sprayed on the black sooth and rusty hinge to darken it.
On the background and the blue diecut I made use of the new spraytool from Tim Holtz, the – what is it called- airbrush thingy which enables you to do airbrushing with markers. The contrast between the background and doily was low, so I darkened the background with black sooth and vintage photo (airbrush) and wiped piucked fence distress stain on the doily.
Blue swirl die cut:The blue diecut is painted with Peackock feathers distress pain, then added some bronze distress stain and wiped it off lightly, and lastly, put decoupage glue on it. Then I didn’t think that was done, so I sprayed some black sooth and rusty hinge on it with the airbrush tool. After it was dry I dabbed some Salty oceon on it with a sponge.
Frame and large butterfly: are heat embossed with bronze embossing powder. The butterfly was made a few weeks ago. It was stamped onto cardstock which was inked up with Brilliance Moonlight white.
Small butterfly: made a while ago, see this post “Time is the essence of life“.
The flowers: Diecuts from a Marianne Design die, maybe the small petaled one is from Joy!Crafts. Inked the edges and leaves.
Layering: Matted it onto cream colourd paper. The blue layer is made by using the Peacock Feathers distress paint on paper (from the kids, they were colouring on their coloured paper and I did a tiny bit of crafting, ofcourse they wanted to dab with the dabber too. Ofcourse I let them – better to teach them how to use it properly, and tell them they can use it when I’m there, then to forbid them too and have them do it when I’m not looking!

We went on to use the cuttlebug, they love using it 🙂 My oldest understands the paper has to go in the folder and in the stack, although he doesn’t really know how to build the stack. My daughter is still too young for that, she will be 2 soon, she slips (only) a piece of paper in the machine and starts turning – ofcourse not much happens since there is no resistance. When I help her – build a stack for her – she loves to turn the handle.
The piece of paper for my frame however was too big for the cuttlebug (and folder), so I grabbed a … what’s the word in English… doughroller (literal translation) – the thing you use to flatten dough – and rolled it over the embossing folder, repositioning the folder untill all the paper was embossed. I dabbed some distress stain bronze on it and sprayed black sooth on it with the airbrushtool.
Glued it onto cardstock which was made brown with Vintage Photo.

Challenges
I’d like to enter the following challenges with this card. If there are special requirements to participate, I’ve mentioned those (again) behind the challenge link.
- We love vintage challenge blog – Butterflies; (Ik volg via rss feed en heb de google friend connect ook ingevuld)
- Simply Create too – Challenge #70 Fall/Autumn;
- Kraftyhands Challenges – Autumn Colours; (following via rss feed)
- A Vintage Journey – Autumn; Tim Holtz his influence: he is what made me enthousiastic about cardmaking. I got a lot of his products (markers, stains, paints, inks, latest buy is the airbrush tool). How he has influenced my style: The ease with which he makes things. Things don’t need to be perfect. The background would certainly be up in his alley, and putting airbrushed splatters on the background and diecut to age the item too. Also the frame with the text is distressed by inking the (cream coloured) paper a bit with vintage photo then spraying water on it. (I only used the wrong spray, so don’t have little pretty dots but more like one big dot). Another influence is that paper isn’t uniform in colour – none of the layers are uniform of colour exccept the cream one. The others have darker and ligher areas, and in case of the blue layer I even dabbed a not reinked sponge of a darker blue (salty ocean) on it. The overall look fo the card is not what I’d expect to see from him though, (don’t he’d ever use doilies) and ofcourse the main image is a digi image (thought the butterflies, frame and text is stamped). So no worries if I’m not eligble for a prize.
Crafting with the kids
Now onto the part about crafting with the kids. We painted a tissuebox-box, an mdf cutout from a castle and a mushroom, and some tags and other wood embellishments. My plan is to put a finish on the box so the colour looks more vibrant (it is a bit pale when it dries, as it’s children’s paint), and maybe add some more embellishments and then give it as a gift to my mom. She has allready seen it, as my kids showed her, so I’m not spoiling a surprise!
I helped paint the side of the box, as you can see. My children are still too small to not blend all the colours untill it’s a purple shade of grey. Also, the lid looks great like it is on the first pictures, doesn’t it? When we where nearly finished, my son put red paint all over the top. Then I went to the sink with my daughter to wash her hands, and I told him he could clean the plastic tablecloth with the cloth that was there. When I returned to the table he had done that, but was also “cleaning” the box. It does have an interesting look now, looks quite distressed! Great technique T! Thanks!
As I said earlier, the colours look really dull now, but they’ll brighten up a bit after putting some kind of sealer on it. My plan is to seal it without the kids using spray finisher (spuitlak) or seal it with decoupage glue and have the kids add embellishments (or just torn paper or some of my unused die cuts or punch-cuts). I am very tempted to spruce the items up a bit now though, like really paint a castle or dots on the mushroom, or add more colour. But it’s the kids project, so I should let it as it is. What I should have done, I realize now, is make examples. Not while they are paintin – I am running around too much trying to prevent the whole table (legs and underside), chairs and floor getting under the paint, and preventing brushes going into mouths or painting of hands, arms, faces. No time for a project for myself then!
Thank you for visiting, even it it’s just to browse the pictures!